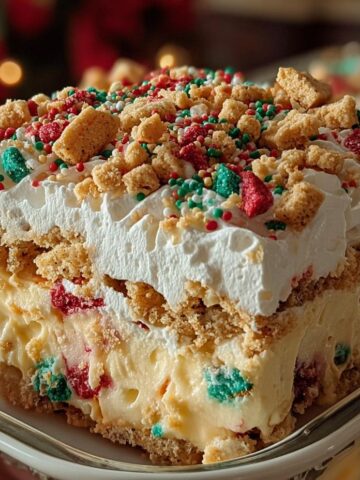
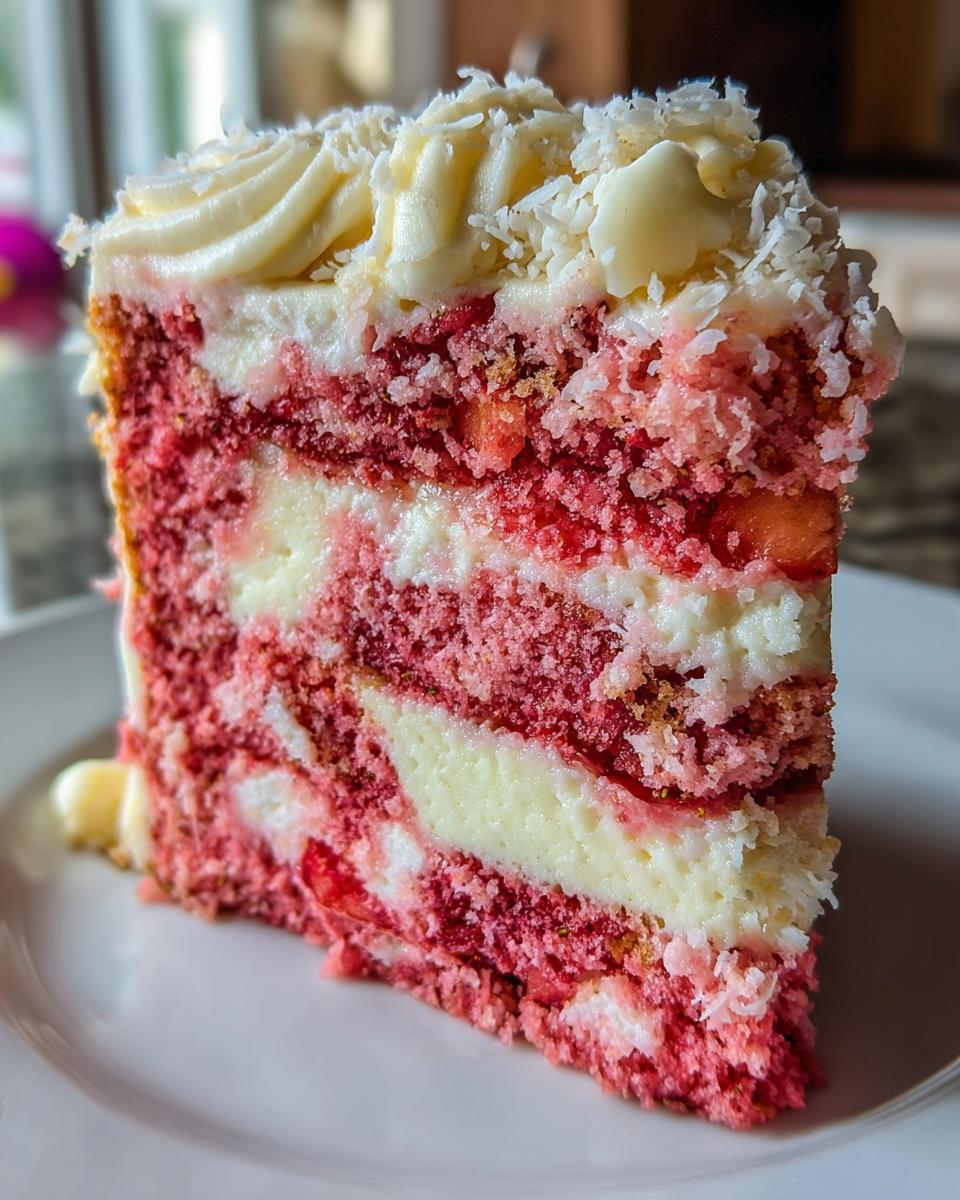
There's something about the Strawberry Earthquake Cake that brings back the sweetest memories of summer picnics in the park. I remember my grandma whipping up this delightful treat for our family gatherings, her kitchen filled with the sweet scent of strawberries and cream cheese. It was always a race to see who could snag the first piece before it disappeared! This cake isn't just a dessert; it's a celebration, a reminder of lazy afternoons spent laughing and eating with loved ones.
This Strawberry Earthquake Cake is perfect for any occasion, from birthdays to casual get-togethers. With its vibrant colors and rich flavors, it brightens up any dessert table. Plus, it's so easy to make that even the busiest of us can whip it up in no time. Trust me, every bite is a little piece of summer bliss, and I can't wait for you to try it!
Why You'll Love "Strawberry Earthquake Cake"
- Quick and easy to prepare, taking only about 20 minutes to get in the oven.
- Uses a simple box cake mix, making it beginner-friendly and foolproof.
- Perfectly fruity and creamy, it's a crowd-pleaser that appeals to all ages.
- Can be made with fresh or frozen strawberries, so it's versatile year-round.
- Freezer-friendly, so you can make it ahead and enjoy it later.
- Minimal ingredients needed, yet it delivers a show-stopping flavor!
Ingredients You'll Need
- 1 box strawberry cake mix
- 1½ cups fresh or frozen strawberries, chopped (fresh strawberries offer a burst of flavor, but frozen work just as well!)
- 1 cup white chocolate chips or chunks (use good quality for the best results)
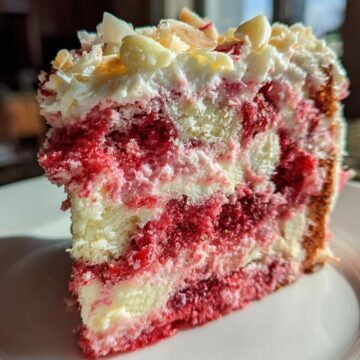
- 1 cup sweetened shredded coconut (this adds a nice texture, but feel free to leave it out if coconut isn't your thing)
- ½ cup chopped pecans or walnuts (optional, but they give a lovely crunch)
- 8 oz cream cheese, softened (let it sit out for a while to soften for easy mixing)
- ½ cup unsalted butter, softened (again, room temperature is key here)
- 2½ cups powdered sugar (sifted for a smoother cream cheese mixture)
- 1 teaspoon vanilla extract (it really enhances the flavor, so don't skip it!)
Step-by-Step Instructions
Preheat the Oven
- Preheat your oven according to the cake mix package instructions. Usually, it's around 350°F (175°C), but double-check just in case!
Prepare the Cake Batter
- In a mixing bowl, prepare the cake mix as directed on the box. This usually involves adding water, oil, and eggs, so read those instructions carefully!
- Once your batter is ready, gently fold in the chopped strawberries, white chocolate chips, shredded coconut, and chopped nuts if you're using them. This mix will give your cake that delightful earthquake effect, so don't skimp on any of these goodies!
Make the Cream Cheese Swirl
- In a separate bowl, beat together the softened cream cheese, unsalted butter, powdered sugar, and vanilla extract until the mixture is smooth and creamy. You want it to be luscious, so take your time here!
Assemble the Cake
- Now, pour half of the strawberry cake batter into your greased baking pan, spreading it evenly. Trust me, this layer is going to be the foundation of your earthquake!
- Next, drop spoonfuls of the cream cheese mixture over the batter. Don't worry about being perfect; a little chaos is what we're after!
- Pour the remaining cake batter on top, then gently swirl the cream cheese mixture with a knife or a skewer. You want a marbled effect, not a completely mixed one.
Bake the Cake
- Bake according to the cake mix package instructions, usually around 30-40 minutes, or until a toothpick inserted into the center comes out clean. Keep an eye on it; you want it to be perfectly golden brown!
Cool and Serve
- Once done, allow the cake to cool in the pan for about 10 minutes before transferring it to a wire rack. Let it cool completely before slicing and serving. This is the hardest part - the smell will be incredible, and you'll want to dive right in!
Variations
- Swap out strawberries for other fruits like blueberries or raspberries for a different flavor profile.
- Try using dark chocolate chips instead of white for a richer taste.
- For a lighter version, use a sugar-free cake mix and reduce the sugar in the cream cheese mixture.
- Make it gluten-free by using a gluten-free cake mix.
- Add a splash of almond extract for a delightful twist to the cream cheese swirl.
Serving and Storage Tips
Serving
Serve the Strawberry Earthquake Cake at room temperature for the best flavor. It pairs beautifully with a scoop of vanilla ice cream or a dollop of whipped cream on top. For an extra touch, garnish with fresh strawberries or a sprinkle of coconut for visual appeal!
Storage
Store any leftover cake in an airtight container in the fridge for up to 3 days. If you want to keep it longer, freeze the cake wrapped tightly in plastic wrap for up to 3 months. Just thaw it in the fridge overnight before enjoying again!
Helpful Notes
- For a dairy-free option, use vegan cream cheese and butter substitutes.
- Consider using flavored cake mixes like lemon or vanilla for a unique twist.
- Add in mini marshmallows to the batter for extra sweetness and texture.
- If you're nut-free, simply omit the pecans or walnuts without losing flavor.
- Feel free to adjust the sweetness of the cream cheese swirl by adding more or less powdered sugar to taste.
Frequently Asked Questions
Can I freeze the Strawberry Earthquake Cake?
Yes, you can absolutely freeze the Strawberry Earthquake Cake! Once it’s completely cooled, wrap it tightly in plastic wrap and then in aluminum foil to prevent freezer burn. It will keep well for up to 3 months. When you’re ready to enjoy it, simply thaw it in the fridge overnight. You may want to warm it slightly in the microwave for that fresh-baked taste!What can I use instead of strawberries?
If strawberries aren’t your thing or you want to try something different, you can substitute them with other fruits! Blueberries, raspberries, or even diced peaches would work wonderfully. Just make sure to adjust the amount based on the fruit’s sweetness and juiciness. Each fruit will give the cake its own unique flavor twist!How do I make it gluten-free?
Making the Strawberry Earthquake Cake gluten-free is super easy! Simply use a gluten-free strawberry cake mix instead of the regular one. You can find these at most grocery stores. Just ensure all other ingredients, like the cream cheese and butter, are gluten-free as well. This way, everyone can enjoy a slice without worry!Can I use different types of chocolate?
Absolutely! Feel free to mix it up with different types of chocolate. Dark chocolate chips will give your cake a richer flavor, while milk chocolate will add a sweeter touch. You could even try a combination of white and dark chocolate for a unique taste experience. Just use what you love most, and the cake will still be delicious!Final Thoughts
There you have it, my friend! The Strawberry Earthquake Cake is not just a dessert; it's an experience filled with flavors, memories, and a touch of chaos that makes cooking so much fun. I hope you feel inspired to try this recipe and share it with your loved ones. It's the kind of cake that brings people together, encouraging smiles and sweet conversations around the table. So grab those ingredients, put on your apron, and let the baking begin! I can't wait to hear how yours turns out!
Strawberry Earthquake Cake
Equipment
- Mixing bowl
- Baking Pan
Ingredients
Cake Base
- 1 box strawberry cake mix
- 1½ cups fresh or frozen strawberries, chopped
- 1 cup white chocolate chips or chunks
- 1 cup sweetened shredded coconut
- ½ cup chopped pecans or walnuts (optional)
Cream Cheese Swirl
- 8 oz cream cheese, softened
- ½ cup unsalted butter, softened
- 2½ cups powdered sugar
- 1 teaspoon vanilla extract
Instructions
- Preheat your oven according to the cake mix package instructions.
- Prepare the cake mix as directed on the box, adding the chopped strawberries, white chocolate chips, coconut, and nuts if using.
- In a separate bowl, beat the cream cheese, butter, powdered sugar, and vanilla until smooth.
- Pour half of the cake batter into the baking pan, then drop spoonfuls of the cream cheese mixture on top. Add the remaining batter and swirl gently.
- Bake according to the cake mix package instructions or until a toothpick comes out clean.
- Allow to cool before slicing and serving.