There's something magical about Christmas desserts, and my No Bake Christmas Oreo Lasagna has become a staple in our family gatherings. I still remember the first time I made it, inspired by a friend's potluck. The moment I brought it out, the kids' eyes lit up with excitement, and my mom couldn't resist sneaking a piece before dinner even started. Each layer is a delightful surprise, and it's all so simple to whip up that I often find myself making it on a whim.
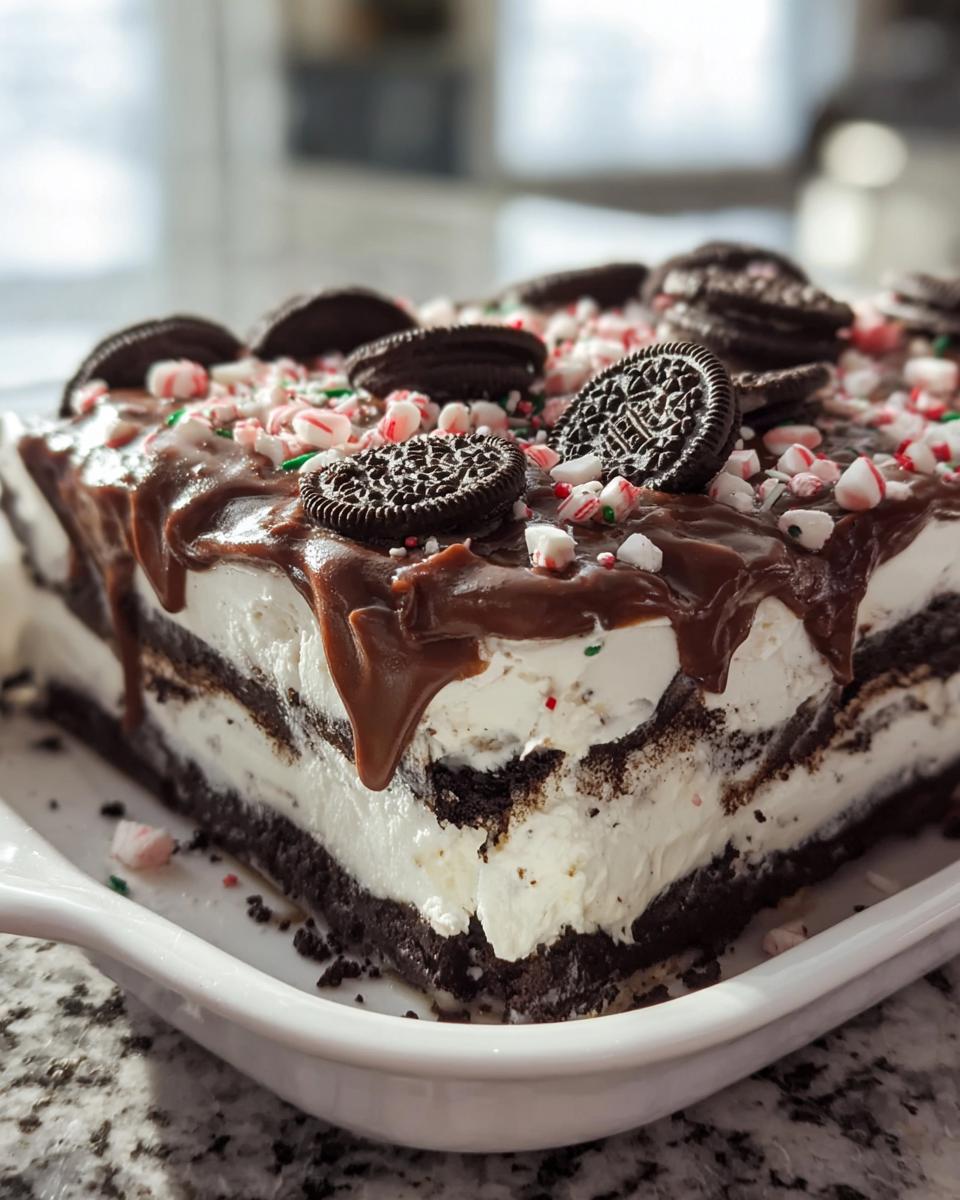
This dessert is perfect for the holiday season, not just because it's delicious but because it brings everyone together to enjoy something sweet and festive. The creamy layers, crunchy Oreos, and seasonal toppings make it feel like a celebration in every bite. Plus, since it's a no-bake recipe, you can spend less time in the kitchen and more time making memories with loved ones. Trust me; this No Bake Christmas Oreo Lasagna is destined to become a cherished tradition in your home too!
Why You'll Love "No Bake Christmas Oreo Lasagna"
- Quick and easy to prepare - takes just 20 minutes!
- No baking required, so it's perfect for busy holiday times.
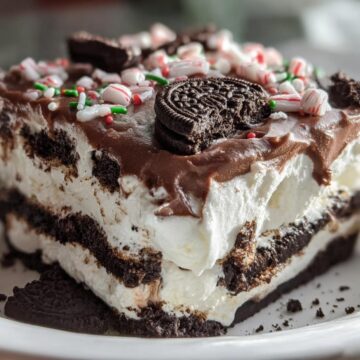
- Layers of creamy goodness with a delightful crunch from the Oreos.
- Family-friendly dessert that everyone will love; kids can even help!
- Customize with your favorite seasonal toppings for a personal touch.
- Great for make-ahead entertaining; just refrigerate until serving.
Benefits
- Fast prep means more time to enjoy the festivities.
- No oven needed, keeping the kitchen cool and stress-free.
- The combination of flavors and textures will have everyone coming back for seconds.
- Kids love helping crush Oreos and adding toppings, making it a fun family activity.
- Versatile enough to adapt with different flavors or dietary needs.
- Can be made in advance, so it's ready when you are!
Ingredients You'll Need
For the Crust
- 24 Oreo cookies, crushed - use regular or double-stuffed for extra creaminess
- ¼ cup melted butter - this helps bind the cookie crumbs together; don't skip it!
For the Filling
- 8 oz cream cheese, softened - make sure it's at room temperature for easy mixing
- ½ cup powdered sugar - this adds a touch of sweetness, so adjust to your taste
- 1 cup whipped topping - any brand will do, but I love using a light version for a fluffier texture
For the Pudding Layer
- 1 package instant chocolate pudding mix (3.9 oz) - feel free to experiment with different flavors if you're feeling adventurous
- 2 cups cold milk - whole milk gives a richer taste, but any milk will work
For the Topping
- Candy canes, crushed - a festive touch that adds a delightful crunch
- Red and green sprinkles - because what's a Christmas dessert without some sparkle?
- Mini chocolate chips (optional) - sprinkle these on for an extra chocolatey kick!
Step-by-Step Instructions
Preheat the Oven
No baking required here, so we won't need to preheat anything! Just gather your ingredients and let's get started!
Make the Crust
- In a mixing bowl, combine the crushed Oreo cookies and melted butter. Stir well until all the crumbs are coated with butter.
- Press the mixture into the bottom of a 9x13 inch baking dish to form a solid crust. Make sure it's packed tightly so it holds together nicely!
Prepare the Filling
- In another bowl, beat the softened cream cheese and powdered sugar together until the mixture is smooth and fluffy. You want it to be creamy, so take your time here!
- Gently fold in the whipped topping until fully incorporated. This will add that light and airy texture we're looking for.
- Spread this creamy mixture evenly over your Oreo crust. Don't be shy; make sure every corner is covered!
Make the Pudding Layer
- Prepare the chocolate pudding according to the package instructions. Typically, this means whisking the instant pudding mix with the cold milk until it thickens-about 2 minutes.
- Once thickened, pour the pudding over the cream cheese layer, spreading it evenly with a spatula for a smooth finish.
Assemble the Lasagna
- Now that your layers are all set, take a moment to admire your work! But we're not done yet.
- Carefully tap the baking dish on the counter to settle everything down a bit. This helps prevent any air bubbles!
Add the Toppings
- Time to make it festive! Top the pudding layer with crushed candy canes, sprinkling them generously over the surface.
- Add a colorful dash of red and green sprinkles to really make it pop. Don't hold back-make it as festive as you like!
- If you're feeling adventurous, sprinkle on some mini chocolate chips for an extra treat!
Refrigerate
Cover the baking dish with plastic wrap and refrigerate the lasagna for at least 2 hours. This helps everything set up nicely and makes it easier to cut into squares later. Trust me; the wait will be worth it!
Variations
- Swap Oreo cookies for gluten-free chocolate cookies for a gluten-free option.
- Try different pudding flavors like vanilla, butterscotch, or even peppermint to match your theme.
- Add a layer of fresh berries between the cream cheese and pudding layers for a fruity twist.
- Make it a lighter version by using low-fat cream cheese and whipped topping.
- Top with seasonal fruits like pomegranate seeds for a festive touch!
Serving and Storage Tips
Serving
Serve the No Bake Christmas Oreo Lasagna chilled for the best texture. Cut into squares and consider pairing it with a scoop of vanilla ice cream or a dollop of whipped cream for extra indulgence!
Storage
Keep leftovers covered in the refrigerator for up to 3 days. You can freeze it for up to 2 months, but be sure to slice it first and wrap each piece individually to maintain freshness.
Helpful Notes
- For a dairy-free option, use vegan cream cheese and whipped topping.
- Feel free to substitute crushed graham crackers for the crust for a different texture.
- Add a splash of vanilla extract to the cream cheese mixture for extra flavor.
- Mini marshmallows make a fun addition to the topping for a whimsical touch.
- If you want to reduce sugar, use sugar-free pudding mix and whipped topping.
Frequently Asked Questions
Can I freeze No Bake Christmas Oreo Lasagna?
Yes, you can freeze it! Just slice the lasagna first and wrap each piece tightly in plastic wrap, then place them in a freezer-safe container. It'll stay fresh for up to 2 months!
What can I substitute for cream cheese?
You can use mascarpone cheese, ricotta cheese, or even a dairy-free cream cheese alternative if you're looking for a lighter or vegan option.
How long can I store leftovers?
Leftovers can be stored in the refrigerator for up to 3 days. Just make sure to cover it well to keep it fresh!
Can I use different flavors of pudding?
Absolutely! Feel free to experiment with flavors like vanilla, butterscotch, or even strawberry for a fun twist. Just follow the same mixing instructions.
What are some topping ideas?
Some fun topping ideas include mini marshmallows, crushed nuts, or a drizzle of chocolate syrup. You can even add fresh fruit like strawberries or raspberries for a refreshing touch!
Final Thoughts
I hope you're as excited to make this No Bake Christmas Oreo Lasagna as I am to share it with you! It's such an easy and delicious way to spread holiday cheer, and I promise your family and friends will be asking for seconds. Remember, cooking is all about having fun and creating memories, so don't stress if things get a little messy. Embrace the chaos, and enjoy every layer of this delightful dessert. Happy baking, and may your holidays be filled with laughter, love, and lots of sweet treats!
No Bake Christmas Oreo Lasagna
Equipment
- Mixing bowl
- 9x13 inch baking dish
Ingredients
For the Crust
- 24 cookies Oreo cookies, crushed
- ¼ cup melted butter
For the Filling
- 8 oz cream cheese, softened
- ½ cup powdered sugar
- 1 cup whipped topping
For the Pudding Layer
- 1 package instant chocolate pudding mix (3.9 oz)
- 2 cups cold milk
For the Topping
- Candy canes, crushed for topping
- Red and green sprinkles for topping
- Mini chocolate chips (optional) for topping
Instructions
- In a mixing bowl, combine crushed Oreo cookies and melted butter. Press the mixture into the bottom of a 9x13 inch baking dish to form the crust.
- In another bowl, beat the softened cream cheese and powdered sugar until smooth. Fold in the whipped topping and spread this mixture over the crust.
- Prepare the chocolate pudding according to the package instructions using cold milk. Pour the pudding over the cream cheese layer and spread evenly.
- Top with crushed candy canes, sprinkles, and mini chocolate chips if desired. Refrigerate for at least 2 hours before serving.