Every time I make this Chocolate Orange Cheesecake, I'm transported back to family gatherings at my grandma's house, where the aroma of citrus and chocolate filled the air, mingling with laughter and stories. It was her signature dessert, a show-stopper that always left our taste buds dancing with delight. As a kid, I'd sneak in for a spoonful before it even made it to the table, and that's a tradition I've carried on with my own family. This cheesecake isn't just a recipe; it's a cherished memory wrapped in a creamy, decadent hug.
This Chocolate Orange Cheesecake is perfect for any occasion, whether it's a cozy family dinner or a festive holiday gathering. The balance of rich chocolate and zesty orange makes it feel special, yet it's incredibly easy to whip up. Trust me, once you take that first bite, you'll understand why this cheesecake is a keeper in my recipe box!
Why You'll Love "Chocolate Orange Cheesecake"
- Quick to prepare: Ready in just 30 minutes with no baking required!
- Minimal ingredients: Simple pantry staples and fresh flavors come together effortlessly.
- Family-friendly: A crowd-pleaser that kids and adults alike will adore.
- Perfect for any occasion: Great for birthdays, holidays, or just a sweet treat.
- Make-ahead dessert: Chilling overnight enhances the flavors and makes it easy to serve.
- Freezer friendly: It can be frozen for up to a month, so you can always have a special dessert on hand.
Ingredients You'll Need
- 250 g Digestive Biscuits, crushed
- 100 g Unsalted Butter, melted (I prefer using organic for a richer flavor)
- 600 g Cream Cheese, softened (full-fat cream cheese works best for creaminess)
- 150 g Caster Sugar (you can substitute with powdered sugar for a finer texture)
- 300 ml Double Cream (look for heavy cream for the best results)
- 2 oranges, zested (freshly grated zest imparts a brighter flavor)
- 1 teaspoon Orange Extract (optional, but really enhances the orange flavor)
- 100 g Dark Chocolate, melted (use at least 70% cocoa for a deep chocolate taste)
Step-by-Step Instructions
Prepare the Base
Let's get started on that delicious base that gives our cheesecake its crunchy, buttery goodness!
- Begin by crushing the digestive biscuits. You can use a food processor for a fine crumb, or place the biscuits in a sealed plastic bag and crush them with a rolling pin. It's a great way to relieve any stress!
- Once the biscuits are nicely crushed, transfer them to a mixing bowl.
- Next, pour the melted unsalted butter over the crushed biscuits and mix until it resembles wet sand. You want every crumb to be coated in buttery goodness!
- Now, press the mixture firmly into the bottom of a springform pan. Use the back of a spoon or your fingers to make it even and compact. This will be the sturdy foundation for our cheesecake.
Make the Filling
Time for the creamy filling that will send your taste buds into a frenzy!
- In a large mixing bowl, add the softened cream cheese. Make sure it's at room temperature; this will help it mix smoothly.
- Add the caster sugar to the cream cheese and beat them together until well combined. You want it to be light and fluffy, so don't rush this step!
- Pour in the double cream, and mix again until the mixture becomes thick and creamy. This is where the magic happens!
- Now, add the freshly grated orange zest and orange extract. Mix thoroughly to incorporate that delightful citrus flavor throughout.
- Finally, pour in the melted dark chocolate and gently fold it into the mixture. You want to be careful here; we're trying to keep it light and fluffy!
Assemble and Chill
We're almost there! Let's bring it all together!
- Pour the creamy filling over the biscuit base in the springform pan. Use a spatula to smooth the top so it looks pretty.
- Now, cover the pan with plastic wrap and pop it in the fridge. Let it chill for at least 4 hours, but overnight is even better. This is where all those flavors mingle and develop!
- When you're ready to serve, carefully remove the cheesecake from the springform pan. If you want, you can garnish it with extra orange zest or chocolate shavings for a fancy touch!
Variations
- For a zesty twist, swap half the dark chocolate for white chocolate.
- Add a layer of raspberry or strawberry puree for a fruity contrast.
- Make it gluten-free by using gluten-free biscuits for the base.
- For a lighter version, use low-fat cream cheese and whipped topping instead of double cream.
- Infuse the filling with a splash of Grand Marnier or another orange liqueur for an adult twist.
Serving and Storage Tips
Serving
To serve your Chocolate Orange Cheesecake, slice it into generous wedges and place on chilled plates. It pairs beautifully with a dollop of whipped cream or a scoop of vanilla ice cream. For a pop of color, sprinkle with extra orange zest or chocolate shavings!
Storage
Store any leftovers in the refrigerator, covered, for up to 3 days. If you want to keep it longer, wrap it tightly and freeze for up to a month. To serve after freezing, thaw in the fridge overnight before enjoying!
Helpful Notes
- For a nutty flavor, consider adding crushed nuts like hazelnuts or almonds to the base.
- If you're dairy-free, try using vegan cream cheese and coconut cream as alternatives.
- Feel free to adjust the sugar level based on your taste preference; honey or maple syrup can be great substitutes.
- Using a high-quality chocolate will elevate the flavor of the cheesecake, so choose one you love!
- Always allow the cheesecake to sit at room temperature for about 15 minutes before slicing for cleaner cuts.
Frequently Asked Questions
Can I freeze Chocolate Orange Cheesecake?
Yes, you can freeze Chocolate Orange Cheesecake! Just make sure it's well-wrapped in plastic wrap and then in aluminum foil to prevent freezer burn. It can be frozen for up to a month. When you're ready to enjoy it, simply thaw it in the refrigerator overnight.
What can I substitute for cream cheese?
If you need a substitute for cream cheese, you can use mascarpone cheese for a similar texture. Greek yogurt is another option, but it will give a tangier flavor. For a dairy-free alternative, try using vegan cream cheese made from nuts or tofu. For more information on dairy-free alternatives, check out Healthline's guide to dairy-free substitutes.
How long does the cheesecake need to chill?
The cheesecake needs to chill for at least 4 hours, but I highly recommend letting it sit overnight. This allows all those delicious flavors to meld beautifully, making each bite even more heavenly! For tips on optimal chilling, you can refer to Food Network's guide to chilling cheesecake.
Final Thoughts
I can't wait for you to try this Chocolate Orange Cheesecake! It's a recipe that brings all the warmth and joy of family gatherings right to your kitchen. With its rich flavors and creamy texture, it's bound to become a favorite in your home, just like it is in mine. Remember, the best part of cooking is sharing it with loved ones, so gather your family around and enjoy every delicious bite together. You've got this, and I'm cheering you on from my kitchen to yours!
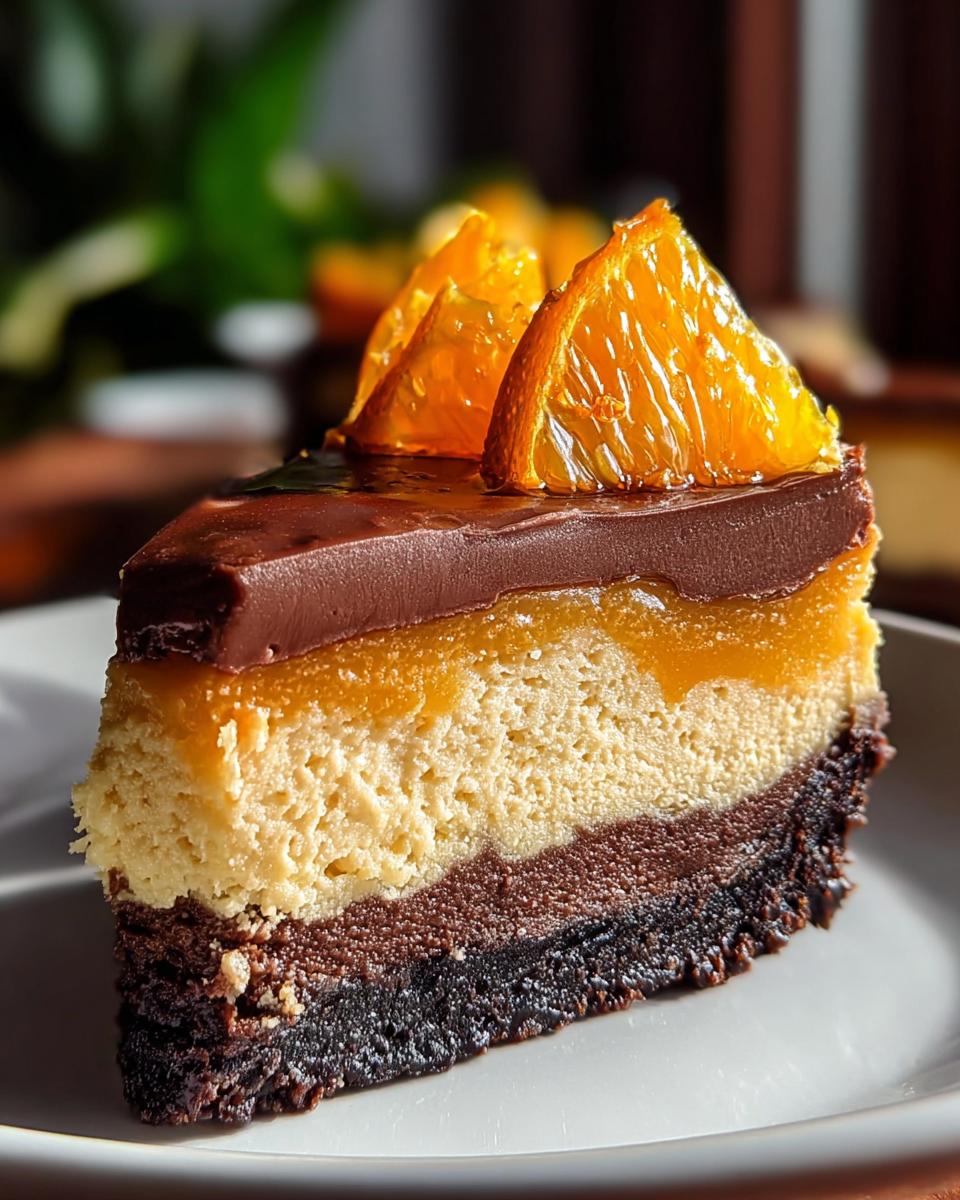
Chocolate Orange Cheesecake
Equipment
- Mixing bowl
- Springform pan
Ingredients
For the Base
- 250 g Digestive Biscuits
- 100 g Unsalted Butter melted
For the Filling
- 600 g Cream Cheese softened
- 150 g Caster Sugar
- 300 ml Double Cream
- 2 oranges Orange Zest
- 1 teaspoon Orange Extract
- 100 g Dark Chocolate melted
Instructions
- Crush the digestive biscuits and mix with melted butter. Press the mixture into the bottom of a springform pan to form the base.
- In a mixing bowl, combine softened cream cheese, caster sugar, double cream, orange zest, orange extract, and melted dark chocolate. Mix until smooth.
- Pour the cheese mixture over the biscuit base in the springform pan. Smooth the top and refrigerate for at least 4 hours before serving.