I'll never forget the first time I made Butterfinger Caramel Crunch Bars. It was a chilly autumn afternoon, and the smell of melting chocolate and warm caramel filled my kitchen. I had just returned from a pumpkin patch trip with my kids, and we were all buzzing with excitement. I wanted to create something sweet that would warm us up and bring everyone together, and these bars were the perfect treat. The crunchy graham cracker crust, gooey caramel layer, and the irresistible crunch of Butterfinger candy on top created a flavor explosion that had us all reaching for seconds.
These bars are not just a dessert; they're a celebration of cozy family moments. Perfect for fall gatherings, school bake sales, or simply satisfying a sweet tooth on a rainy day, these Butterfinger Caramel Crunch Bars are a delightful addition to any occasion. They're quick to whip up and always disappear fast, making them a go-to recipe in my household. Trust me, once you try these, they'll become a favorite for you too!
Why You'll Love "Butterfinger Caramel Crunch Bars"
Let me tell you, these Butterfinger Caramel Crunch Bars are not just delicious; they're a dream for busy families like mine! With a prep time of just 15 minutes and minimal ingredients, you can whip up a batch in no time. Plus, they're so good that everyone will be asking for seconds (or thirds!). Not to mention, they're perfect for sharing at potlucks or birthday parties. You can even freeze them for later, making them a great make-ahead dessert. Trust me, once you try these, they'll quickly become a staple in your dessert repertoire!
Benefits
- Quick prep time of just 15 minutes.
- Minimal ingredients make them easy to whip up.
- Family-friendly flavors that appeal to everyone.
- Perfect for sharing at gatherings or bake sales.
- Freezer-friendly; store for later enjoyment!
- Decadent and satisfying without being overly complicated.
Ingredients You'll Need
Gathering the right ingredients is key to making these Butterfinger Caramel Crunch Bars a success! Here's what you'll need:
For the Crust
- 2 cups crushed graham crackers (I love using honey-flavored ones for added sweetness!)
- ½ cup unsalted butter, melted (Make sure it's unsalted; we don't want to throw off the sweet balance!)
- ¼ cup granulated sugar (Adds just the right amount of sweetness to the crust.)
For the Caramel Layer
- 1 can (14 oz) sweetened condensed milk (This is the secret to that creamy, dreamy caramel layer!)
- ½ cup unsalted butter (Use the same kind as for the crust to keep it consistent.)
- ½ cup brown sugar, packed (Light or dark works; dark will give a richer flavor!)
- ¼ cup light corn syrup (This helps keep the caramel nice and gooey.)
- ½ teaspoon vanilla extract (Always opt for pure vanilla for the best flavor.)
For the Topping
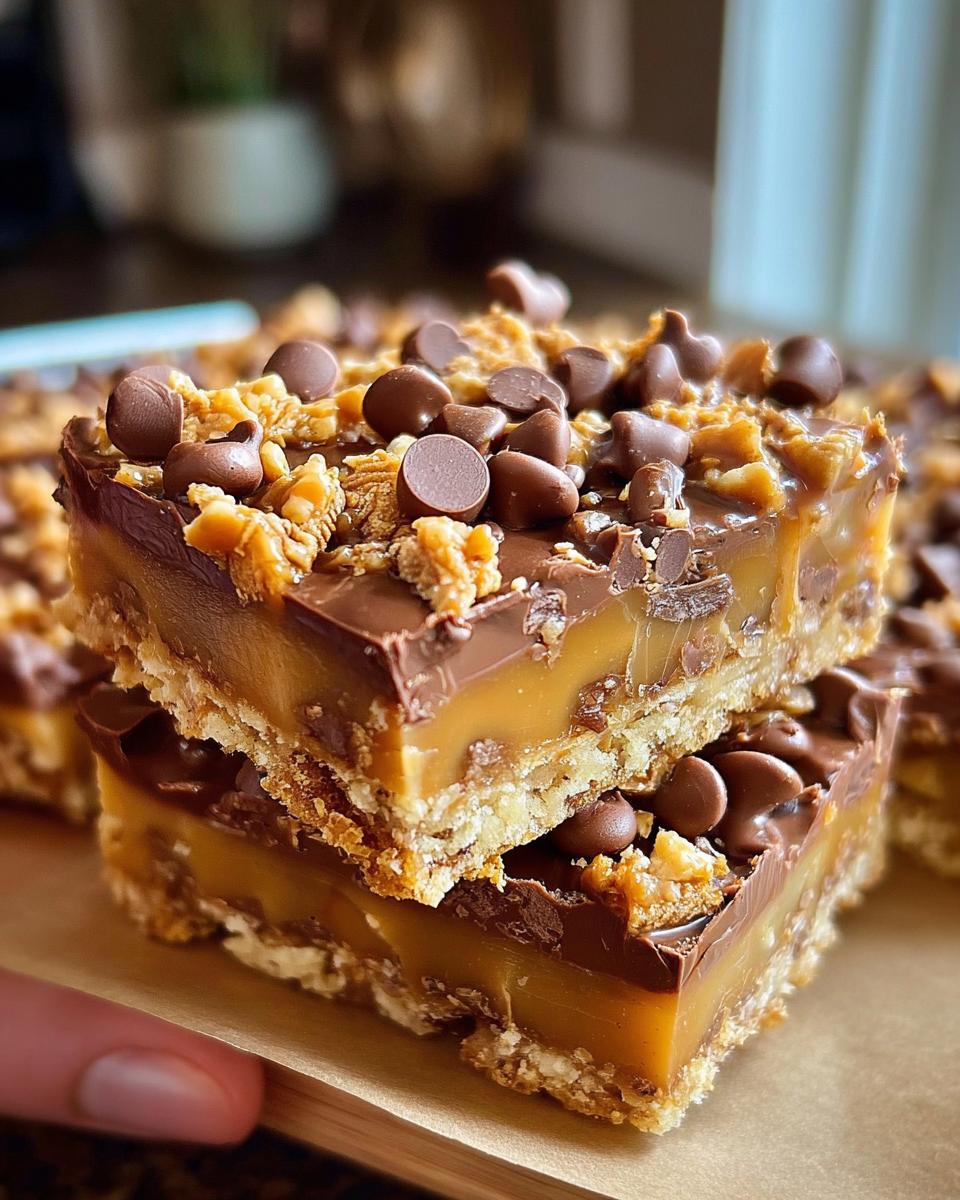
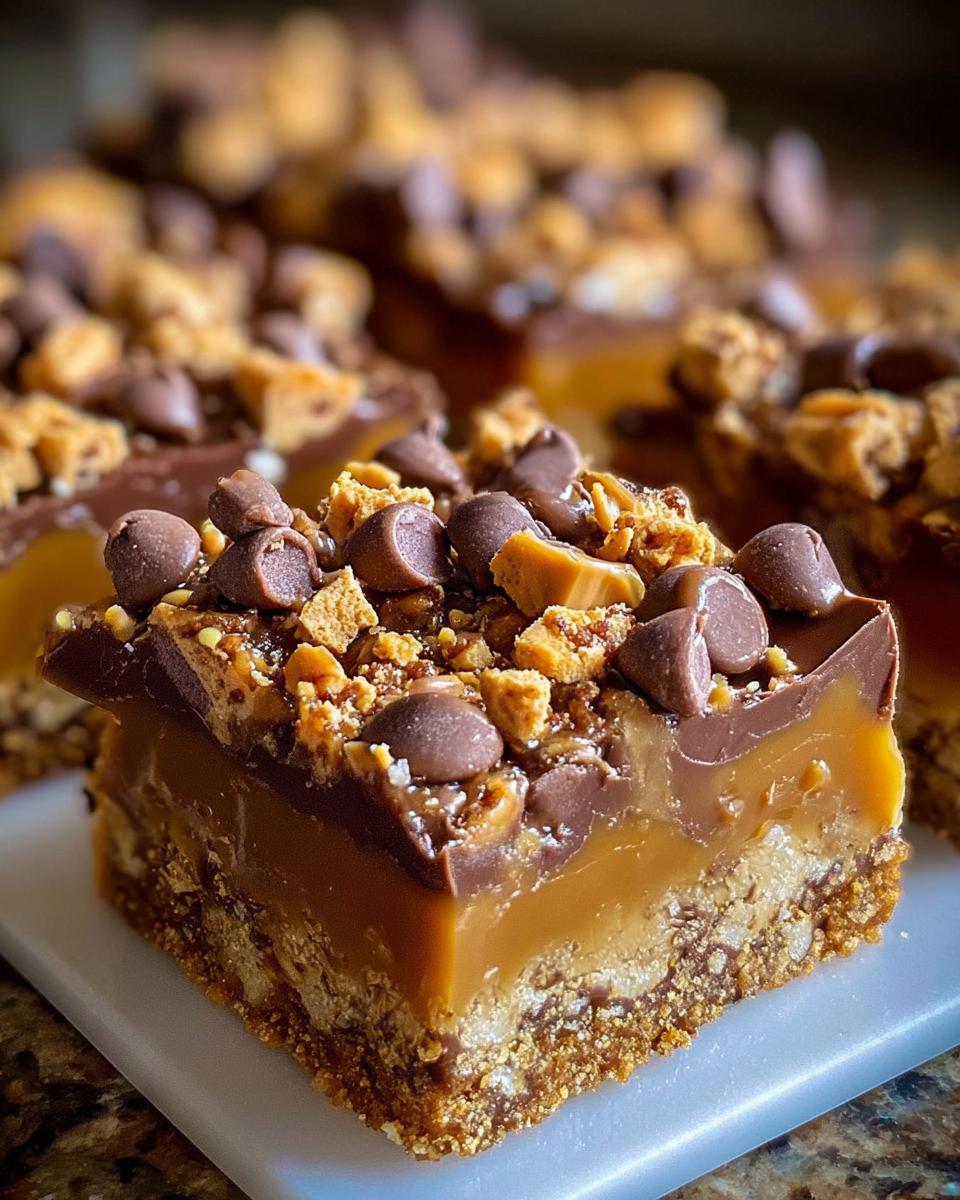
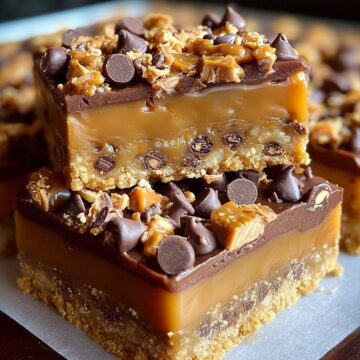
- 1 ½ cups chopped Butterfinger candy bars (Chop them into bite-sized pieces for easy snacking!)
- 1 cup semi-sweet chocolate chips (Feel free to use milk chocolate if you prefer it sweeter.)
- ½ cup crushed pretzels (Optional, but they add a fantastic salty crunch!)
Step-by-Step Instructions
Preheat the Oven
- Start by preheating your oven to 350°F (175°C). This is the perfect temperature to get that deliciously golden crust and set the caramel layer just right!
Make the Crust
- In a mixing bowl, combine the 2 cups of crushed graham crackers, ½ cup of melted unsalted butter, and ¼ cup of granulated sugar. You can use a fork or your hands to mix it well until everything is combined and looks a bit like wet sand.
- Once mixed, take your baking dish and press this mixture firmly into the bottom. I like to use the bottom of a measuring cup for an even layer. We want a solid crust to hold all that gooey goodness!
Prepare the Caramel Layer
- Now, grab a saucepan and combine the can of sweetened condensed milk, ½ cup of unsalted butter, ½ cup of packed brown sugar, ¼ cup of light corn syrup, and ½ teaspoon of vanilla extract.
- Cook this mixture over medium heat, stirring frequently. You want to keep an eye on it and make sure it doesn't stick to the bottom of the pan!
- Continue cooking until the mixture thickens, which usually takes about 5-7 minutes. It should have a nice, creamy texture that you'll want to dive right into!
Assemble the Bars
- Once your caramel is ready, pour it over the graham cracker crust. Use a spatula to spread it evenly so that every bite has that rich caramel goodness.
- Now, it's time for the fun part! Sprinkle the 1 ½ cups of chopped Butterfinger candy bars all over the caramel layer. Make sure to distribute them evenly; you want a bit of that crunch in every bite!
- Next, add the 1 cup of semi-sweet chocolate chips on top of the Butterfinger pieces. If you're feeling adventurous, toss on those optional crushed pretzels for an extra crunch and a hint of saltiness!
Bake the Bars
- Pop the baking dish into your preheated oven and let it bake for about 20-25 minutes. You'll know it's done when the topping is set and the edges are just starting to turn golden.
- Keep an eye on it - you don't want to overbake! A little jiggle in the middle is okay; it will set up as it cools.
Cool and Cut
- Once baked, take the dish out of the oven and let it cool for about 10-15 minutes. This will make it easier to cut into bars without everything falling apart.
- After it's cooled, carefully cut into 12 squares or rectangles, depending on how generous you want your servings to be!
- Let them cool completely in the pan or on a wire rack before serving. This way, you'll have that perfect texture when you take a bite!
Variations
- Swap out the Butterfinger for crushed Reese's Peanut Butter Cups for a chocolate-peanut butter twist.
- Use gluten-free graham crackers to make these bars suitable for gluten-sensitive friends.
- Add a sprinkle of sea salt on top before baking for a sweet-salty flavor explosion.
- Incorporate a layer of mini marshmallows under the chocolate chips for a s'mores-inspired treat.
- For a lighter version, use light butter and reduce the sugar slightly without sacrificing flavor.
Serving and Storage Tips
Serving
These Butterfinger Caramel Crunch Bars are best served at room temperature. You can cut them into squares or rectangles and plate them up for a lovely presentation. Drizzle a bit of melted chocolate over the top or sprinkle with some extra crushed Butterfinger for a decorative touch. They make a fabulous dessert for family gatherings, parties, or just a sweet snack while watching a movie!
Storage
Store the bars in an airtight container at room temperature for up to one week. If you want to keep them fresh longer, you can refrigerate them. Just make sure to let them come to room temperature before serving for the best texture. You can also freeze these bars for up to three months. Just wrap them tightly in plastic wrap and then foil to prevent freezer burn!
Helpful Notes
- If you don't have light corn syrup, you can substitute with honey or maple syrup, but it may alter the flavor slightly.
- For a nutty flavor, consider adding chopped nuts like pecans or walnuts to the topping.
- Make sure to use fresh Butterfinger bars for the best crunch; older ones can get a bit stale.
- If you want to make these bars dairy-free, use coconut milk and dairy-free chocolate chips.
- Feel free to adjust the sweetness by using less sugar in the crust or caramel if you prefer a less sweet dessert!
Frequently Asked Questions
Can I freeze Butterfinger Caramel Crunch Bars?
Absolutely! You can freeze these bars for up to three months. Just wrap them tightly in plastic wrap and then foil to prevent freezer burn. When you're ready to enjoy, let them thaw in the fridge or at room temperature.
What can I use instead of sweetened condensed milk?
If you're looking for a substitute, you can make a homemade version by combining 1 cup of milk with 1 cup of sugar and simmering it until thickened. Alternatively, you can use coconut milk with a bit of sugar for a dairy-free option.
How do I make these bars gluten-free?
To make these bars gluten-free, simply substitute the regular graham crackers with gluten-free graham crackers or crushed gluten-free cookies. The rest of the ingredients are naturally gluten-free!
Can I substitute the Butterfinger candy?
Yes! If you want to switch things up, you can use crushed Reese's Peanut Butter Cups, Snickers, or even chopped Milky Way bars. Just keep in mind that different candies may alter the flavor profile a bit!
Final Thoughts
I really hope you give these Butterfinger Caramel Crunch Bars a try! They're not just a treat; they're a ticket to sweet memories and cozy moments that you can share with family and friends. There's something magical about the combination of flavors and textures, and I can guarantee that once you take that first bite, you'll be hooked! So, gather your ingredients, tie on that apron, and enjoy the process of creating something delicious. Remember, cooking is all about having fun, making a little mess, and sharing love through food. Happy baking!
Butterfinger Caramel Crunch Bars
Equipment
- Mixing bowl
- Baking dish
Ingredients
For the Crust
- 2 cups crushed graham crackers
- ½ cup unsalted butter, melted
- ¼ cup granulated sugar
For the Caramel Layer
- 1 can (14 oz) sweetened condensed milk
- ½ cup unsalted butter
- ½ cup brown sugar, packed
- ¼ cup light corn syrup
- ½ teaspoon vanilla extract
For the Topping
- 1 ½ cups chopped Butterfinger candy bars
- 1 cup semi-sweet chocolate chips
- ½ cup crushed pretzels optional
Instructions
- Preheat your oven to 350°F (175°C).
- Combine crushed graham crackers, melted butter, and granulated sugar in a mixing bowl. Press the mixture into the bottom of a baking dish to form the crust.
- In a saucepan, combine sweetened condensed milk, unsalted butter, brown sugar, light corn syrup, and vanilla extract. Cook over medium heat until the mixture thickens.
- Pour the caramel layer over the crust and spread evenly.
- Sprinkle chopped Butterfinger candy bars and chocolate chips on top. Optionally add crushed pretzels.
- Bake for 20-25 minutes or until the topping is set.
- Let cool before cutting into bars.